This part will cover various small items you can add to your levels for the player to interact with and get surprised by.
This tutorial will start with the blank level found by opening https://invincitech.com/p2/builder/.
Spikes
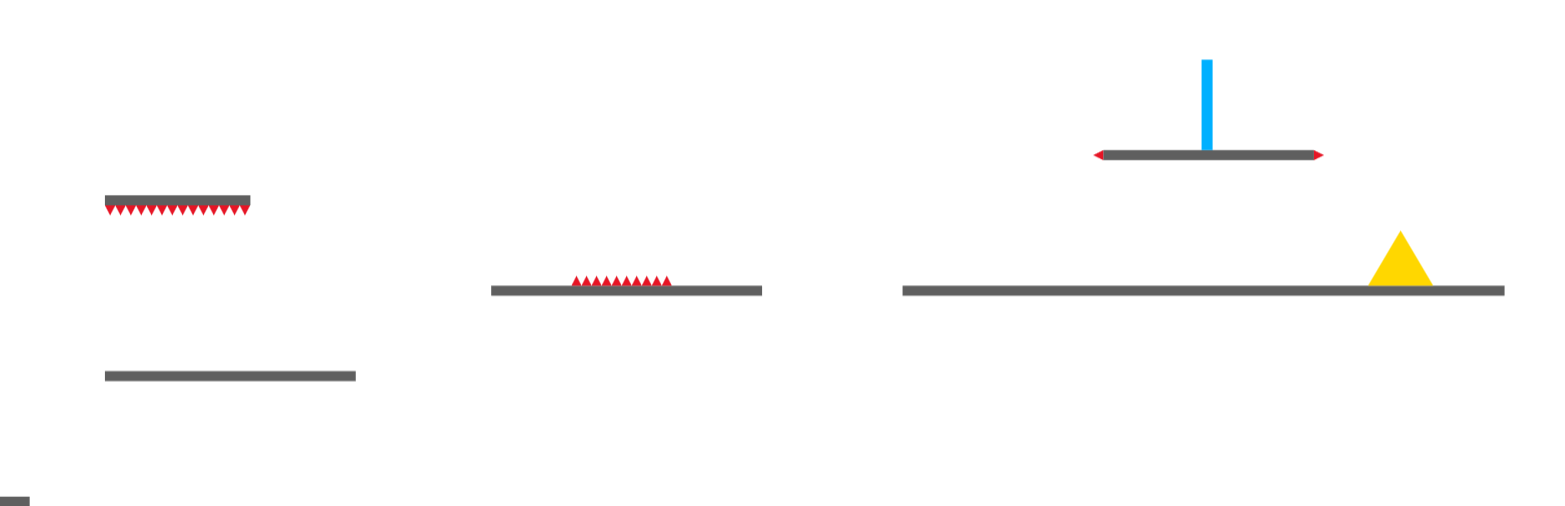
A few platforms and an enemy have been added to the level:
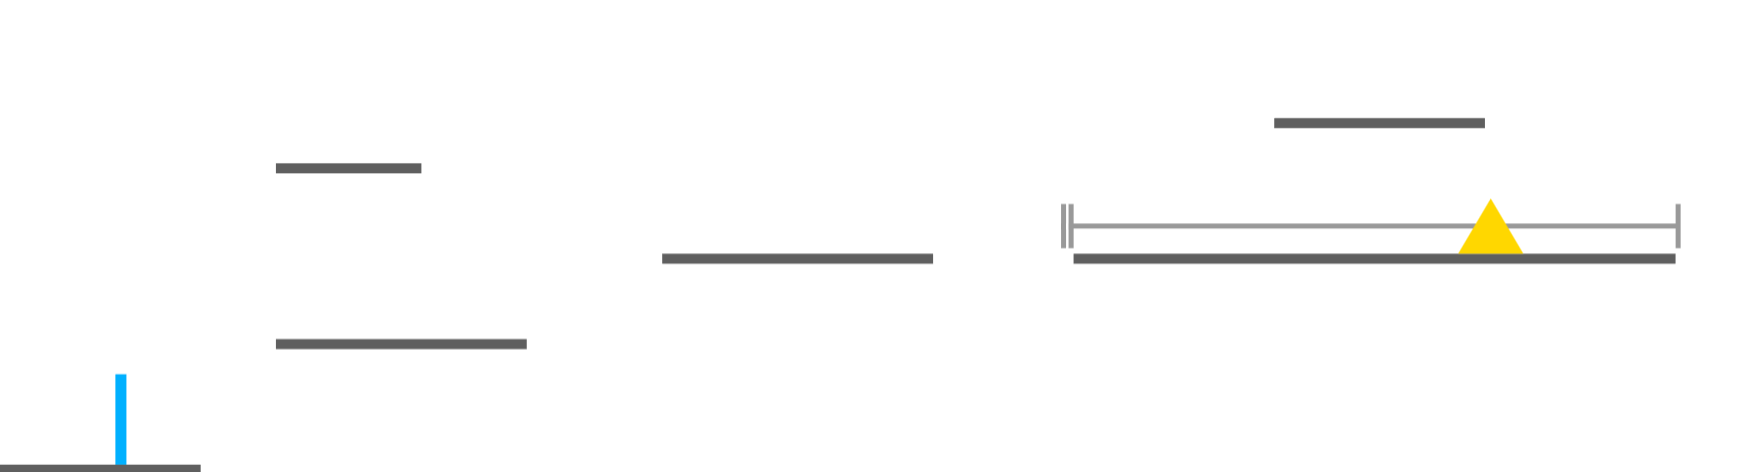
To make it dangerous to jump in the wrong place some spikes are going to be put in.
Spike Row
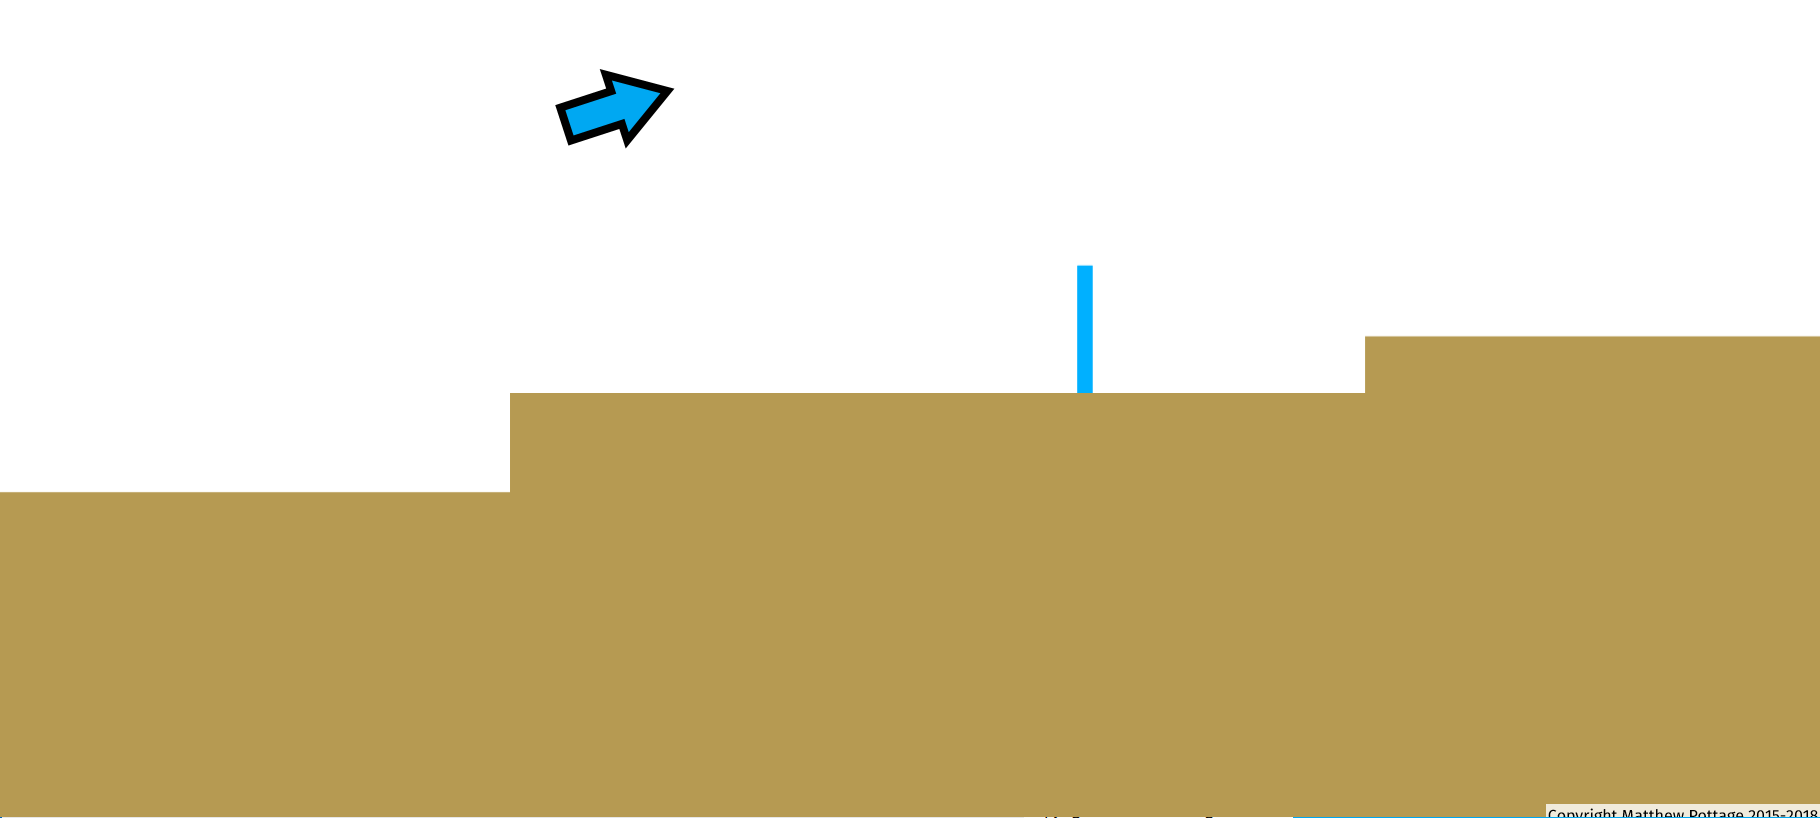
The image indicates where the spikes will go.
Choose “Spike Row” from the list of items to insert:
To insert a spike click-and-drag to make the rectangle it will occupy. If you drag the rectangle downwards from where you first clicked the spikes will point down. Drag it upwards and the spikes will point up.
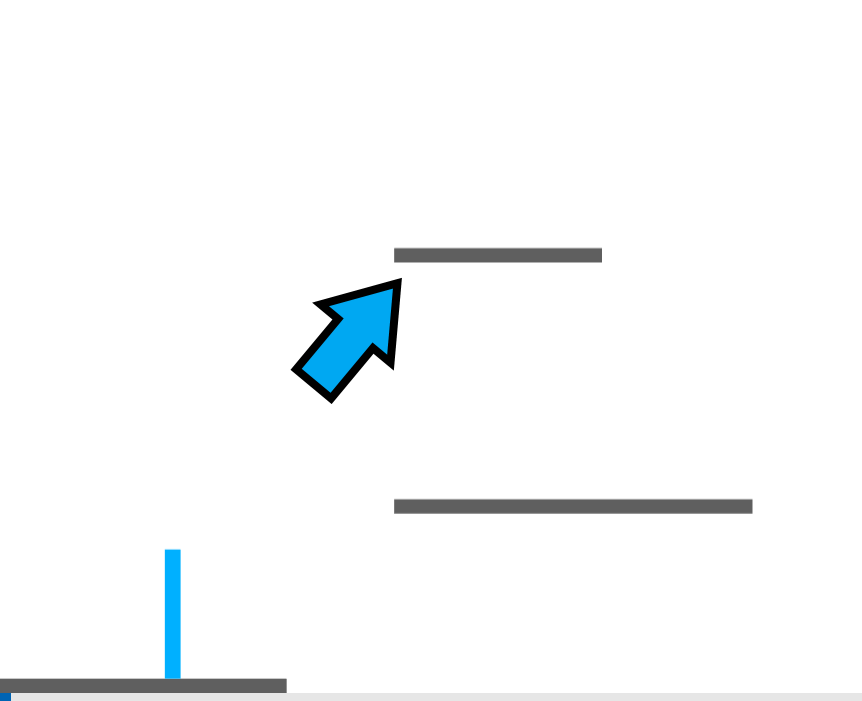
So click-and-hold on the bottom left corner of the platform the arrow points at. Drag the rectangle downwards and all the way along the bottom of the platform, then release the mouse button.
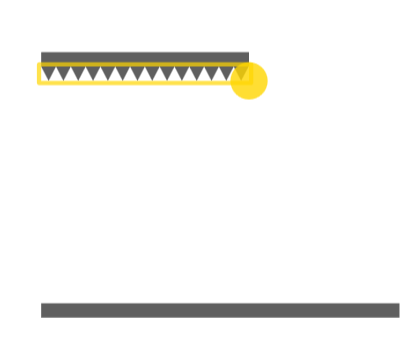
Now try making the player jump into the spikes:

The player loses a health point. Clearly jumping into spikes is a terrible idea.
For the next platform along it will be made so that some spikes stop you running along the platform.

As the spikes point upwards this time drag the rectangle for them starting from the bottom left corner (bottom right works too), and drag upwards.
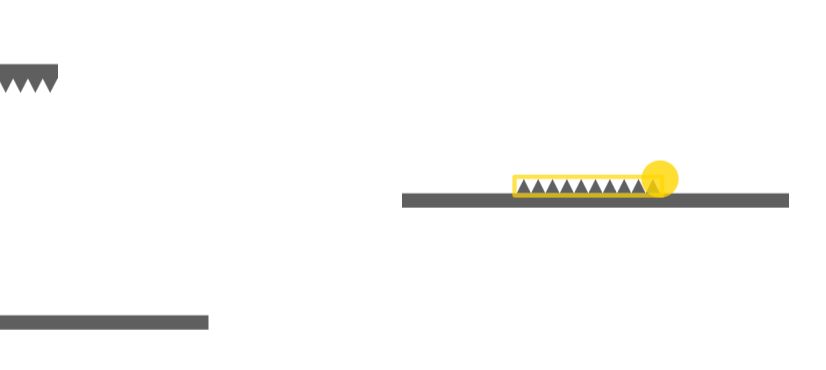
Now the player will have to think twice before rushing.
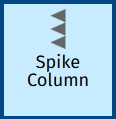
Spike Column
Just like with “Spike Row” how you drag the rectangle for it affects which direction the spikes point. Dragging the rectangle out to the left of where you first clicked makes the spikes point left, and similarly they will point right if you drag to the right.
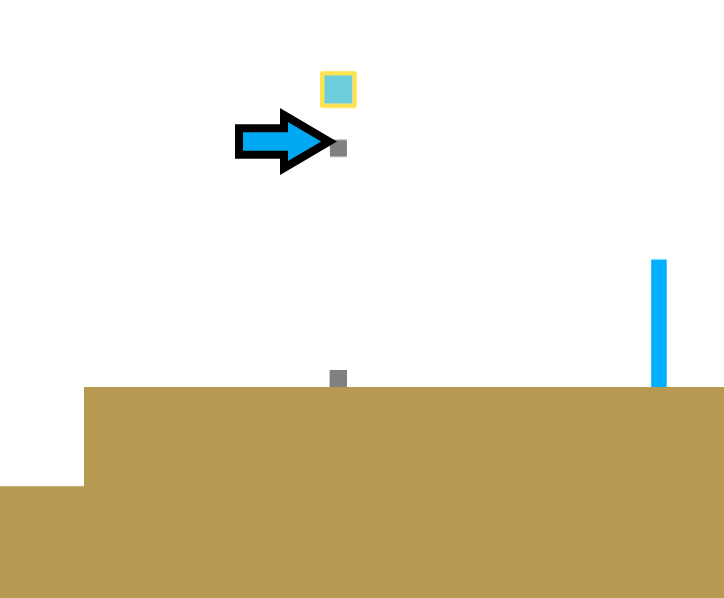
On the next set of platforms with the “Yellow Triangle” with them (shown in the image below) it’s will to be made so that if you clip the edge of the upper platform you hit a spike, so care will need to be taken when jumping.
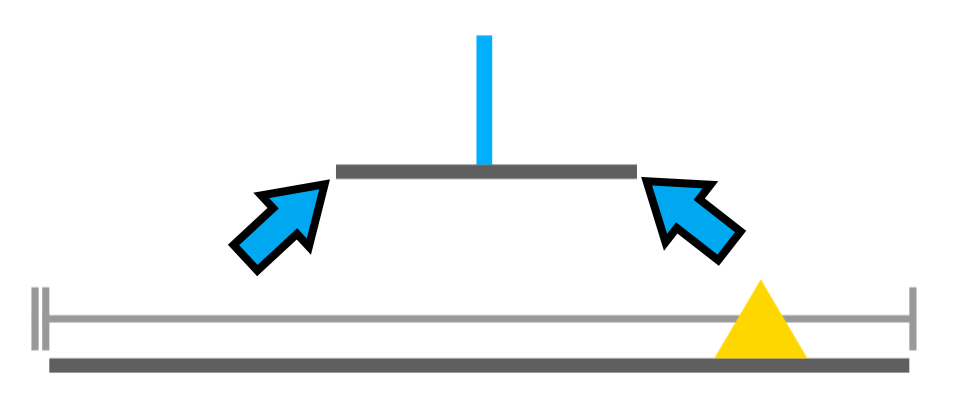
The image indicates where the spikes will be. If you make the rectangle for them small enough there will only be the one spike, which is what will happen here.
Click-and-drag from the top left corner of the upper platform dragging to the left, and make the rectangle for the spikes as tall as the platform. This makes a spike pointing left

Now click-and-drag from the top right corner or the platform dragging to the right to make another spike that points rightward.

Leaving the spikes the same colour as the platform makes them blend in. To make them stand out click on the first “Colour” in the builder controls and choose a new colour. Then click on all the spikes that have been added to change their colour.
Alternative to Spikes
A “Health Loss” is just like a platform, except the player loses a health point on hitting it.

Finishing off
At the end of the level add another platform, and put a “Win Region” above it so that the player can pass the level.
Now click on “Level” in the builder controls to open the configure level screen then click the “Shrink To Fit” button. This ensures the level is just long enough for the items in it. You saw this button before back in part 1.
If you fall off the platforms you will notice that the player just stops:

You can change this. Click on “Level” in the builder controls to open the configure level screen again and click on “Falling off the bottom”:
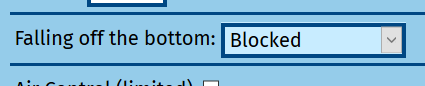
This opens a drop down list (may look different on your computer or tablet, but the same items are available):

Choosing “Killed” will mean the player will die when falling off the bottom of the level.

Choosing “Teleport to start” will make the player go back to it’s start position, normally the top right corner of the level, when it falls off the bottom.

Choose one, but not “Blocked”, as that is what it was originally set to. It’s up to you.
Killed or teleported without falling
You can use a “Death Region” or a “To Start Region” to get the same effect that you can choose for falling off the bottom of the level.
Just like a “Win Region” you click-and-drag to make a rectangle, which is the area the player hits to get the effect.

Like a “Win Region” these regions have special visuals in the level builder:


Cutout
Going back to the level found at https://invincitech.com/p2/builder/demo/.
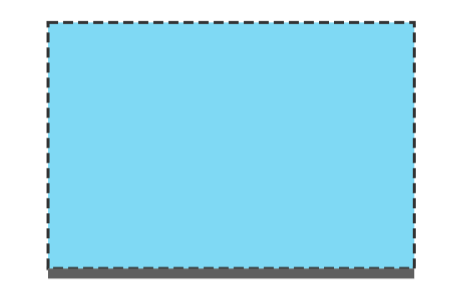
Click on “Cutout” (shortcut “o”) in the builder controls. Now find a nice clear bit of ground:

Click at the point indicated by the arrow, and drag downwards about half the player’s height and make the rectangle that forms go all the way to roughly where the dashed line is.

Release the mouse button. You will see that the rectangle you drew cut away from the platform.
This is what “Cutout” does – you can remove a rectangular part of any combination of platforms.
The level builder splits the existing platforms into smaller pieces to leave the bit cut out.
Water
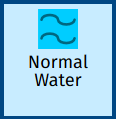
Choose “Normal Water” as the item to insert.
Click-and-hold from the bottom or top right corner of the area you cut away, and drag a rectangle that fills the cutout area:
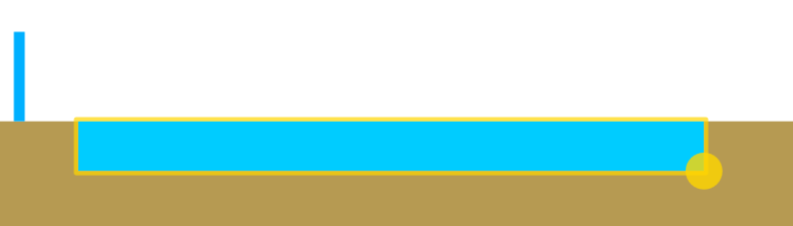
Try moving the player through the water:

The player is slown down by the water, should you try to jump you will see that the player can’t jump as high in water.
Using water can give some variation to the level, and restrict the player, so you can prevent it getting somewhere because it can’t jump so high. For example this level here.
Marsh Water
Delete the water you just added (click on “Delete” in the builder controls then click on the water).
Now use “Cutout” again to make the hole deeper than the player’s height:

Now choose “Marsh Water” to insert.
You insert “Marsh Water” in the same way as water. Make the “Marsh Water” rectangle fill the hole.

If the player falls deep enough into “Marsh Water” it loses a health point and is teleported to near the start of the level.
The marsh water being deeper than the player is tall is more than deep enough.


If you want the player to get past the marsh water you will need to put some platforms in for it to get safely across.

A level found here uses marsh water as a core part of it.
Ice
The player slips and slides, and can’t jump as high on ice. The physics reason is that the player doesn’t have a good enough grip on the surface.
The tutorial is going to back to a blank level again, found by going to https://invincitech.com/p2/builder/.
Delete the platform that is already there at the bottom left, and put a lot of ice in instead. Adding ice is just like adding a platform; You click-and-drag to make a rectangle.

Try moving the player on the ice.
Thin Ice
“Thin Ice” is just like ice, except it disintegrates under the player the moment the player lands on it.
Snow
Ice is great. But snow and ice going together would be perfect. Choose “Snow Emitter” from the list of items to insert.
Enable “Free Camera”.
Now click on the top left corner of the level, drag down about half the player’s height and then drag to the far left, so that the snow emitter stretches goes above all the ice. When your mouse moves over a button to move the camera when you are dragging it moves the camera in that direction.
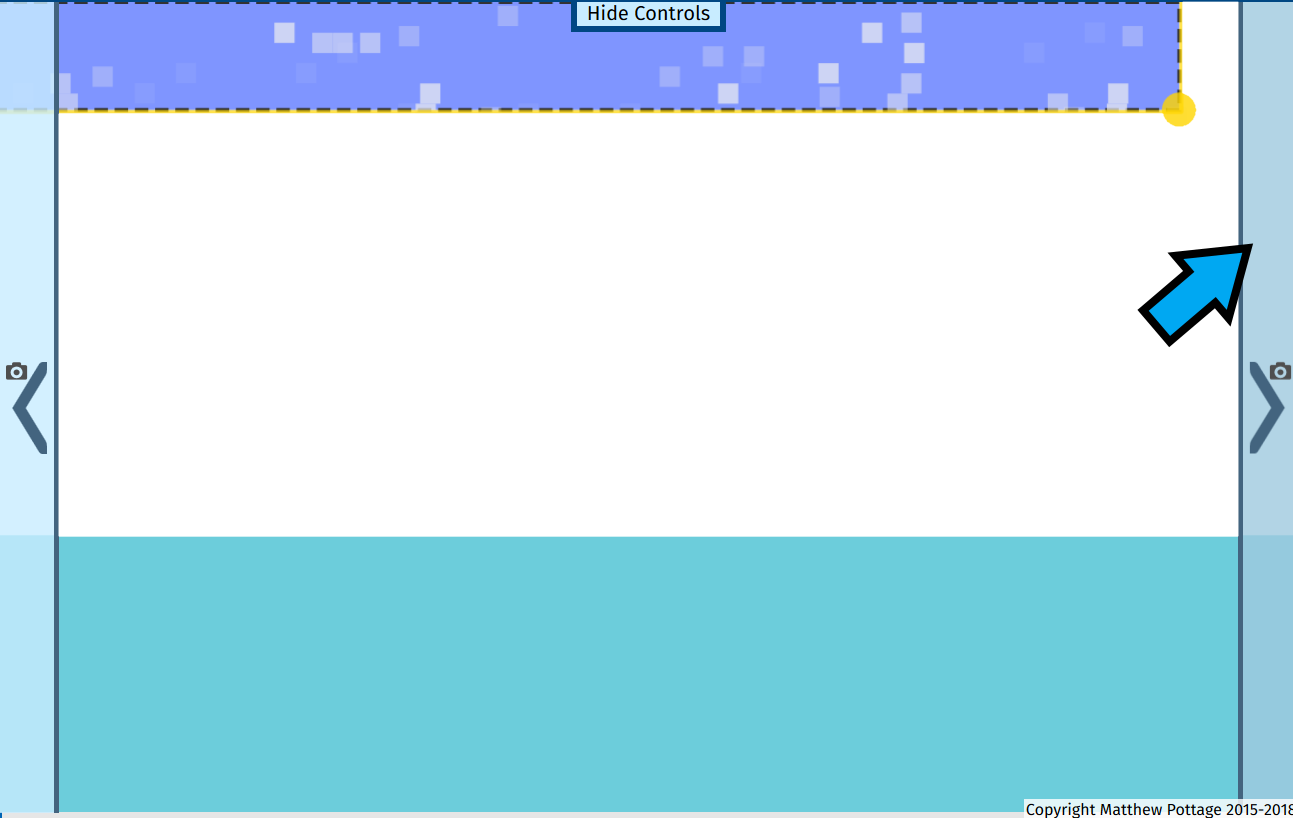
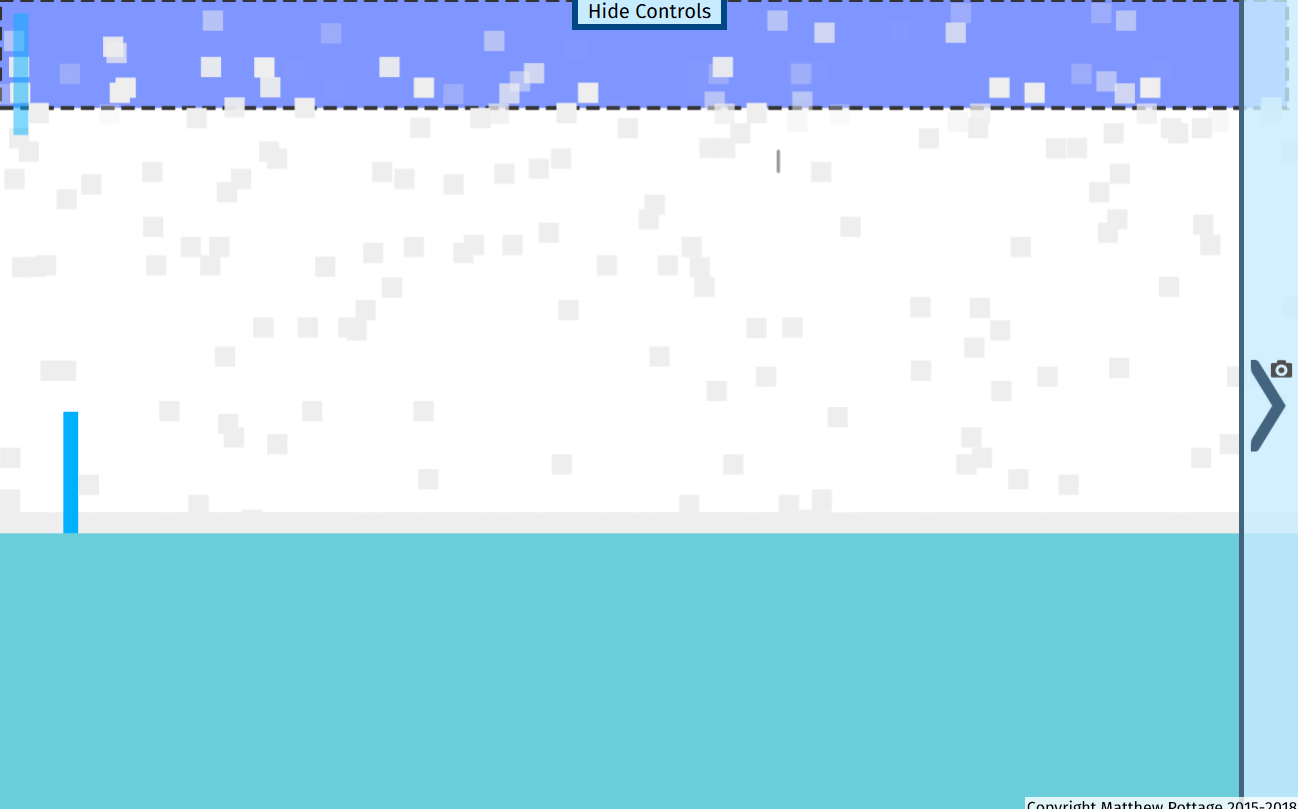
Like many other items the “Snow Emitter” has a special visual that only shows in the level builder – purple/blue-ish area with a dashed outline.
How tall the rectangle is affects how much snow there is. The taller it is, the more snow. Having too much snow will slow the game down, so be careful not to make it too tall.
To see snow and ice in action in a level go here.
Rain
For rain instead of snow, just insert a “Rain Emitter” instead.

Stone Launchers
You can add a “Stone Launcher” which throws a stone in a specific direction repeatedly.
This section will use the pre-made level found at https://invincitech.com/p2/builder/demo/ again.
Choose “Stone Launcher” from the list of items to insert.
Click on a point above the ground.
Then click directly below the square that appears.
The square is the stone launcher. Should the player get hit by a stone it fires it will lose a health point.
To make the “Stone Launcher” send the stones to the left, click to the left of its square after the first click. Similarly click above it for up and to the right for right.
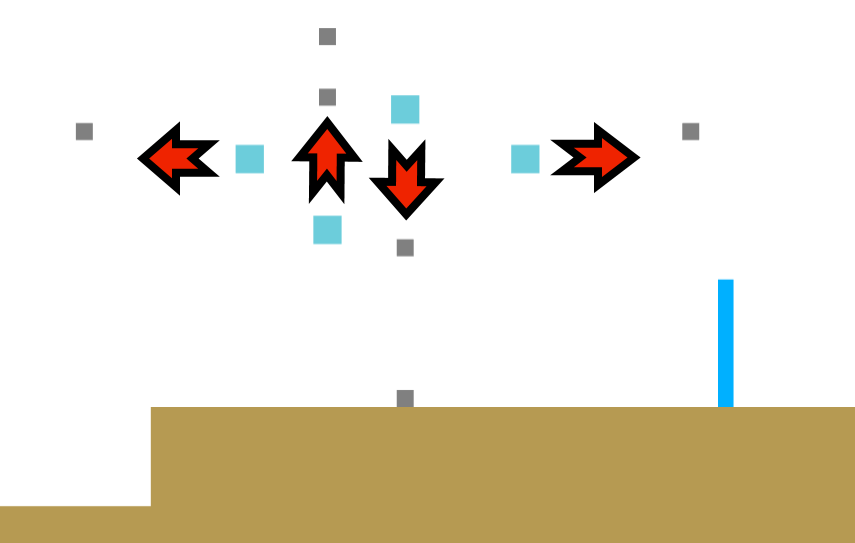
The image shows some examples. To get the direction click where the arrow indicates relative the the “Stone Launcher” you are adding.
A level found here uses stone launchers as a key mechanic.
To have the stone launcher fire directly at the player wherever it is choose “Targetting Stone Launcher” instead.
When inserting it you still have to choose the direction it fires with the second click, but it will only fire in that direction when the player is too far away to hit.
Infinite Health Points
When testing a level you can find that you die too quickly for you to properly test it. Click on “+∞ Hp” in the builder controls to give the player unlimited/infinite health points.

The player won’t even die when it hits a “Death Region”.
Clicking “Play” in the builder controls will take away the infinite health points.

Conclusion
You just saw a lot. Have fun putting everything into your own levels.
In the next part discover creating a hidden area for the player to find.