This part will starting using the “Link” option (used to connect things) in the level builder to provide new ways to customise your levels. This part shows a lot of small features that when used together can give great results.
As usual the level found at https://invincitech/p2/builder/demo/ will be used
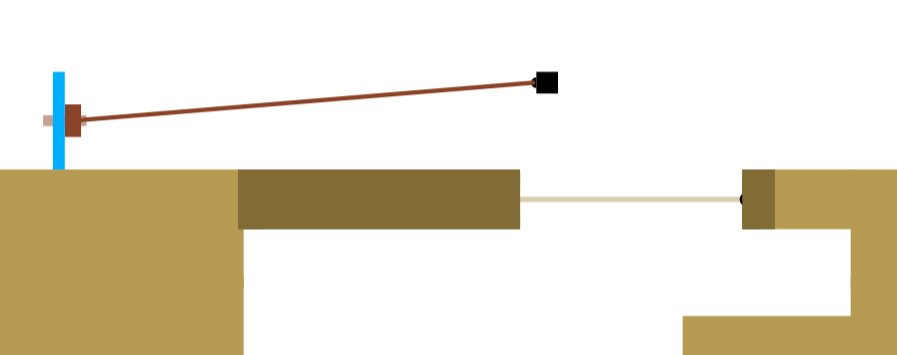
Controlling a moving platform
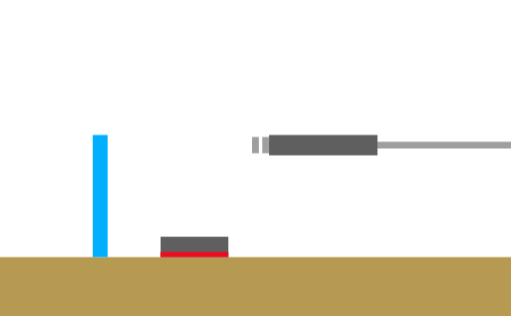
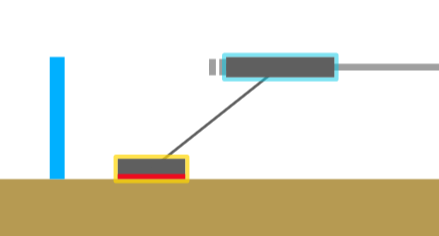
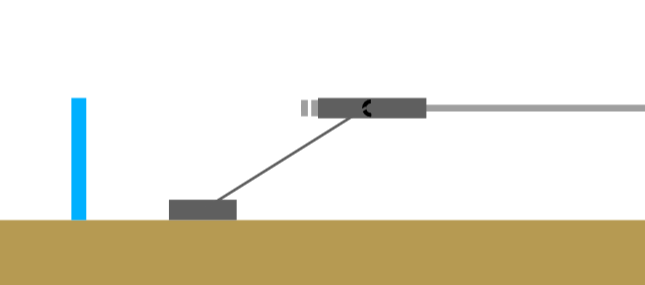
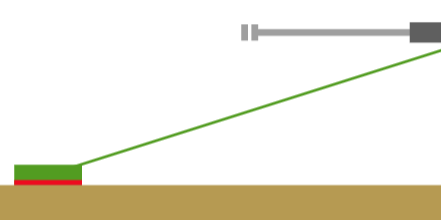
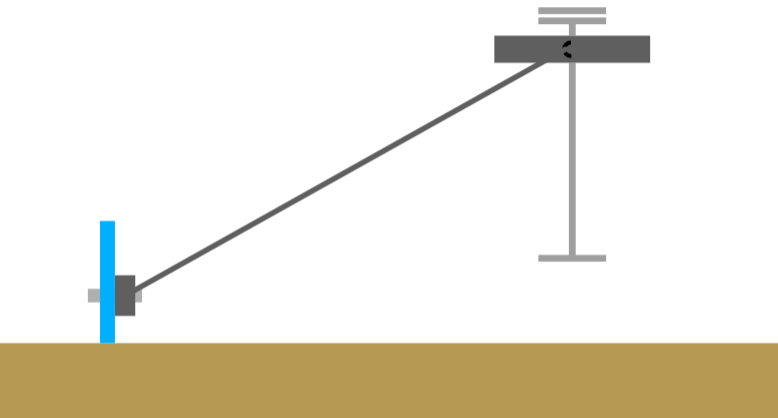
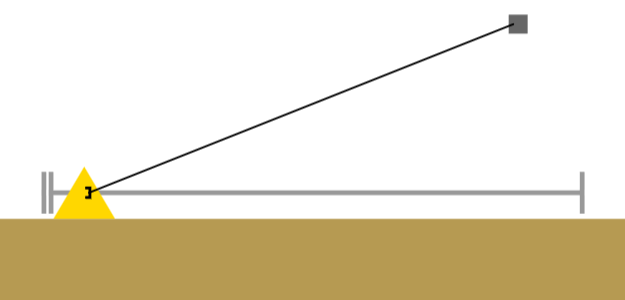
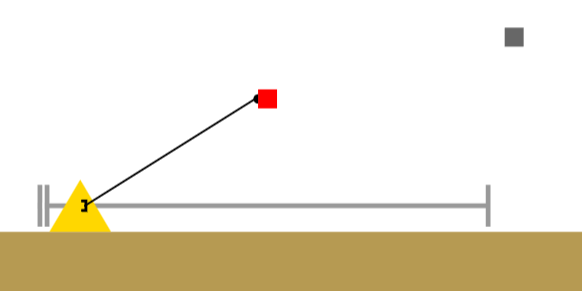
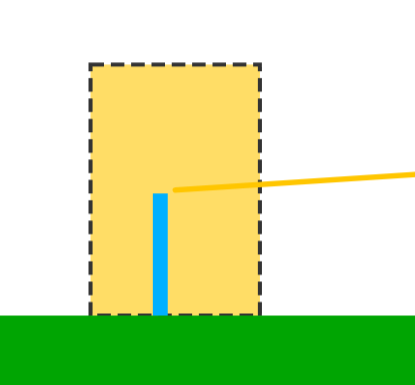
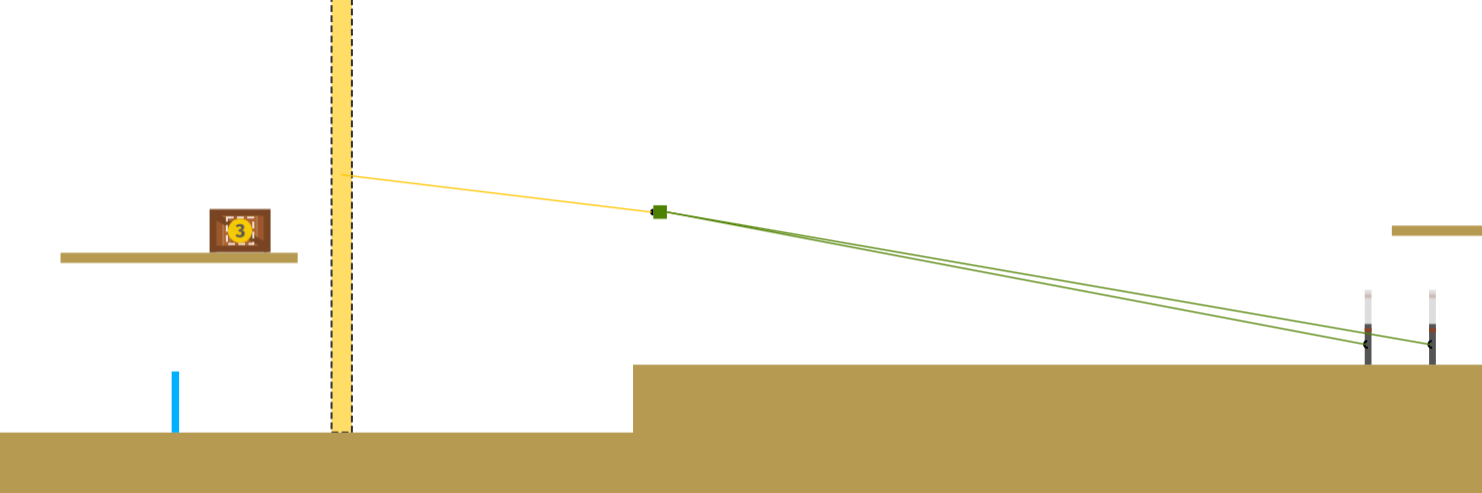
Find a clear spot of ground, and put a “Left/Right Moving Platform” in so that a player can jump onto it.

Now choose “Toggle Button” to insert and put it on the ground to the left of the moving platform.
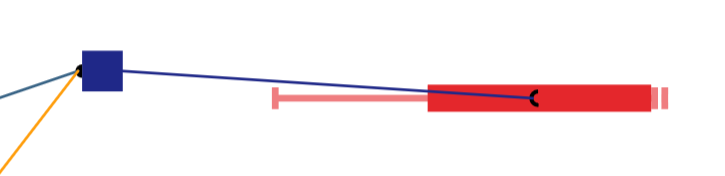
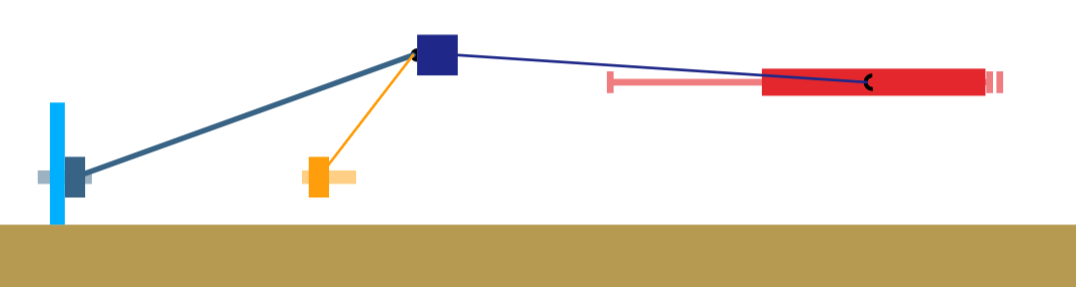
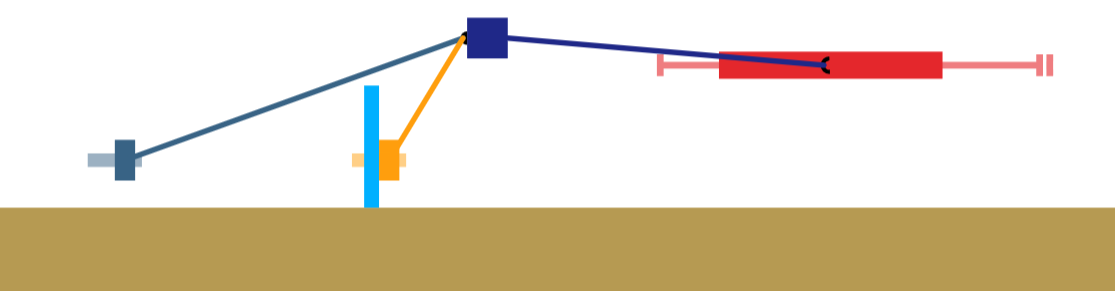
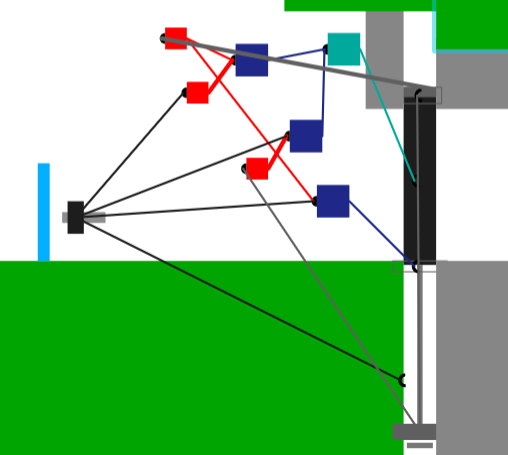
Click on “Link” (shortcut “l”) in the builder controls, then click-and-drag from the button onto the moving platform, and release the mouse button. A line will appear connecting the two when finished
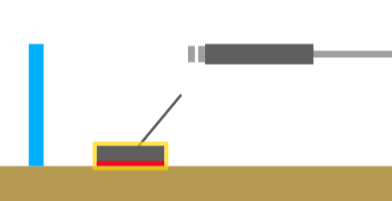

If you have trouble getting the line to clip to the moving platform as it keeps moving, freeze the game first (tick the “Freeze” checkbox in the builder controls).
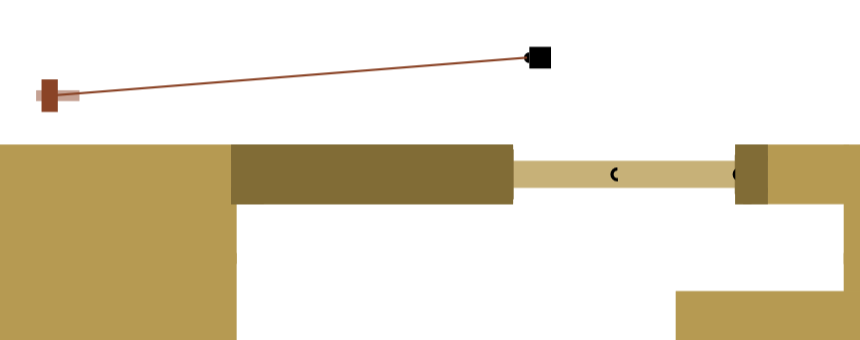
You should notice (when the game isn’t frozen) that the platform no longer moves. This is because the button isn’t switched on. The button is connected to the platform and now controls whether it moves.
To make the platform move you need to change the button to be on; Make the player jump on to the top of the button. The red mark on the button will turn green.
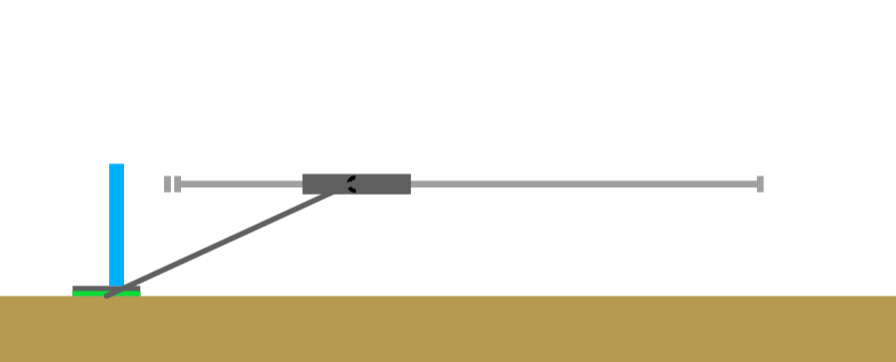
If you make the player jump on the button again, the mark will turn red and the platform will stop.
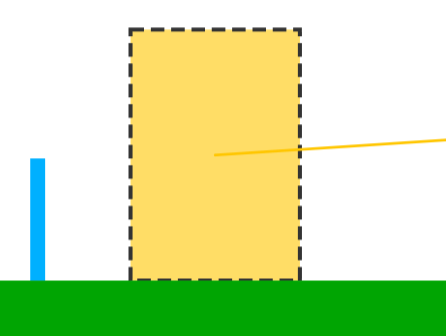
Another type of button
A “Hold Button” is on only when it is pushed down by something standing on it, like a player. Jumping on the button will make the platform move, and jumping off it will stop the platform, when it is connected to it.
Links (the connections)
When connecting items in the level, you are always going from the item that controls the item to the item that is controlled. This is why you drag from the button to the moving platform, not the other way round.
When a button is on the line coming out of it (which is only visible in the level builder) is thicker. If you don’t want to see the lines, or any control items, untick the “Show Logic” checkbox (shortcut “g”).

The colour of the line will change based on the colour of the button.
Not just moving platforms!
Buttons can be used to control lots of things, including stone launchers (turn it on of off), snow (start or stop), rain (start or stop) or even an enemy (make it attack the player or just stand still).
For example:

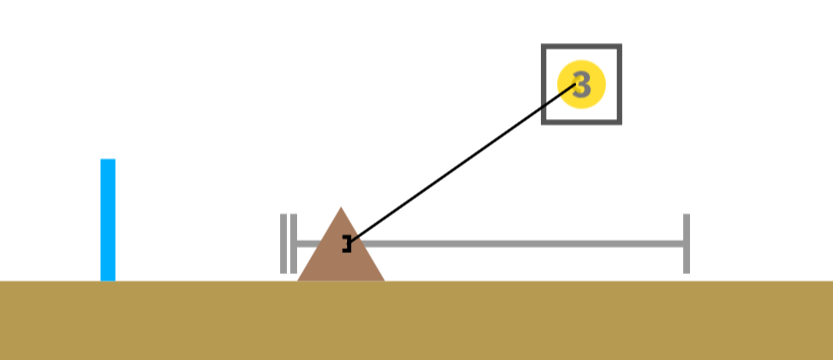
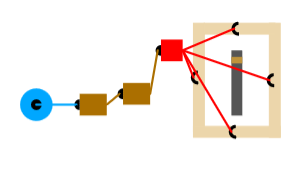
Using a pickup as a button
You can link from a coin (or any pickup), it acts like a button and is on when the coin is collected. It could be made so that in exchange for a coin you have to get past a stone launcher.
First add a stone launcher and a coin, then click on “Link” and then click-and-drag from the coin to the stone launcher to connect them.
Collecting the coin now turns the stone launcher on.
Pickup spawners
A pickup spawner adds a pickup to the level when it is turned on, by a button connected to it.
Choose “Pickup Spawner (of 1)” to add and add one to the level. Click once (or click-and-drag a rectangle for it) to add it.
Similar to wooden boxes to set the pickup it will release, you insert a pickup like normal, but click on the spawner:
If you connect a button to the spawner and turn it on you will notice the coin appears . Click on “Normal” in the builder controls to hide the visual for the pickup spawner first to make it more obvious (like other visuals it is only visible while editing a level).
The coin will appear immediately if nothing links to the spawner.
You might have noticed there’s a few other pickup spawners you can add:
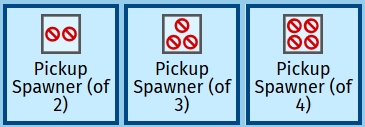
These spawners will randomly pick one of the pickups that are in it (if you put too many in the oldest pickup in there gets removed). If it still has a nothing pickup in it (the red circle with a line running through it) it could pick nothing.
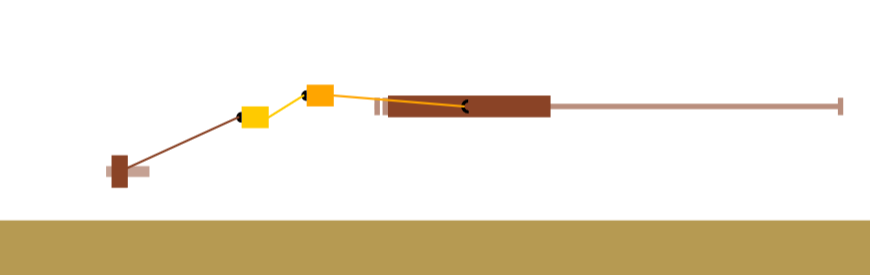
Using an enemy as a button
When an enemy is killed it will act like a button that has been turned on. It could be connected to a pickup spawner to reward a player for killing an enemy.
Add any enemy, and a pickup spawner and put something in it. Then click on “Link” in the builder controls and click-and-drag from the enemy to the pickup spawner.
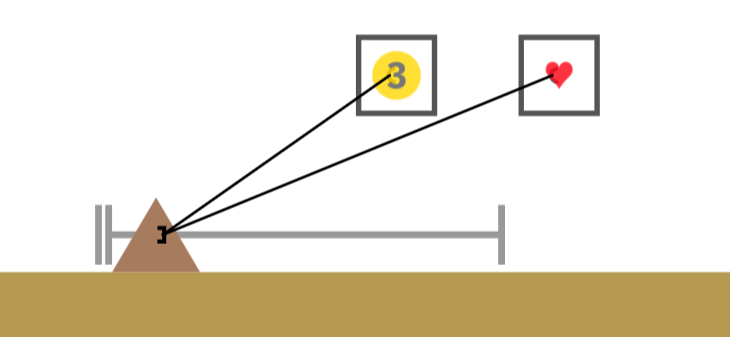
You aren’t restricted in how many things any kind of button can link to, for example you could make it give you two pickups, just click-and-drag from the enemy to the second pickup spawner:
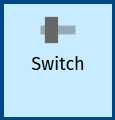
A switch
A switch is pushed on by the player running at it to nudge it over to the right, and pushing back to the left turns it off.
From before
The last part used a collapsing platform as a kind of button to make a cover disappear. It is on when it has collapsed.
A cover can be linked to by anything, for example to make a button cause a cover to disappear, add the button and cover, and connect the button to the cover. A cover will not reappear when the button is turned off again.
Logic blocks
Logic blocks are used to combine multiple buttons to create a new kind of button that is made from the other buttons connected. For example you could make it so that two buttons have to be switched on to make something happen.
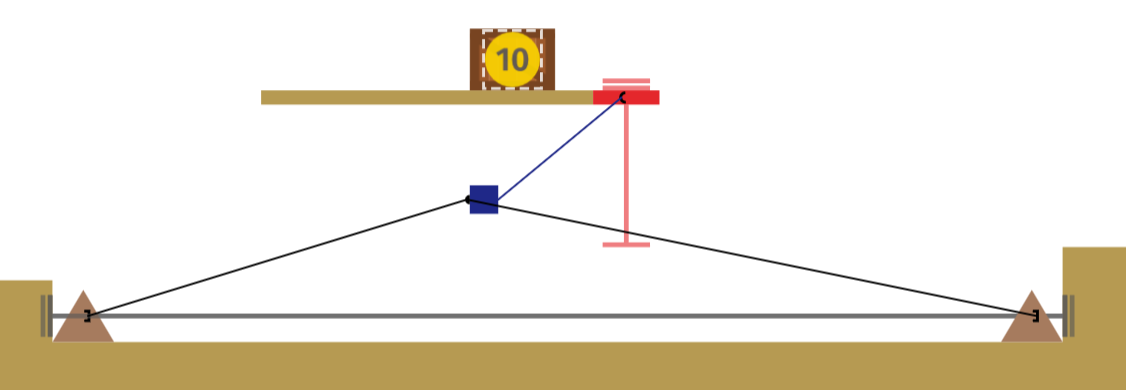
Two buttons, one moving platform
A “And (links)” block can have multiple items connecting to it, and acts like a button that is on only when all the items connecting to it are. This can be used to make a moving platform only work when two buttons are on.
Try adding two buttons (any kind will do), an “And (links)” item and a moving platform.

Now connect both the buttons to the “And (links)” item.

Finally connect the “And (links)” to the moving platform.
Try turning just one switch on, nothing should happen.
With both of them on, it will start moving.
You can do something similar with enemies, which also act like buttons, to only make the moving platform to take a player up high come on when the enemies are defeated.
You can connect more than two items to a “And (links)” to check for say three, four or even ten enemies, and turn anything that can be controlled on or off.
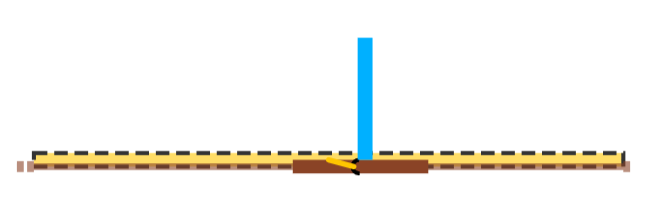
Opposite of on/off
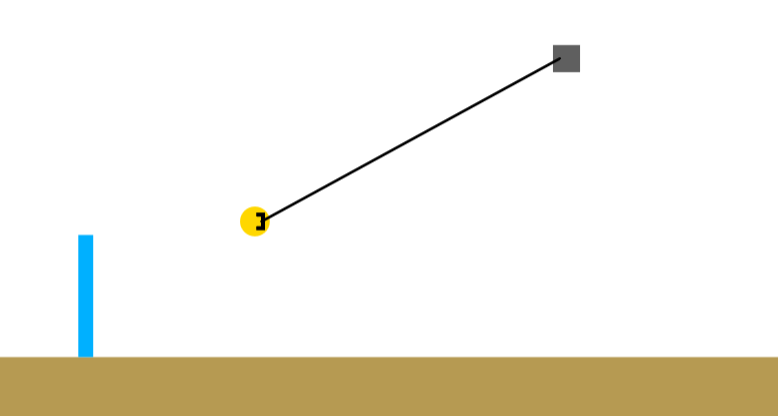
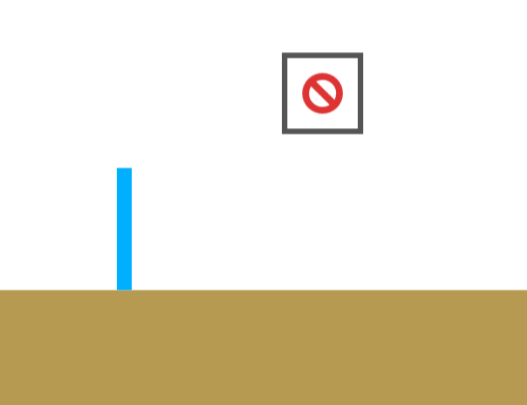
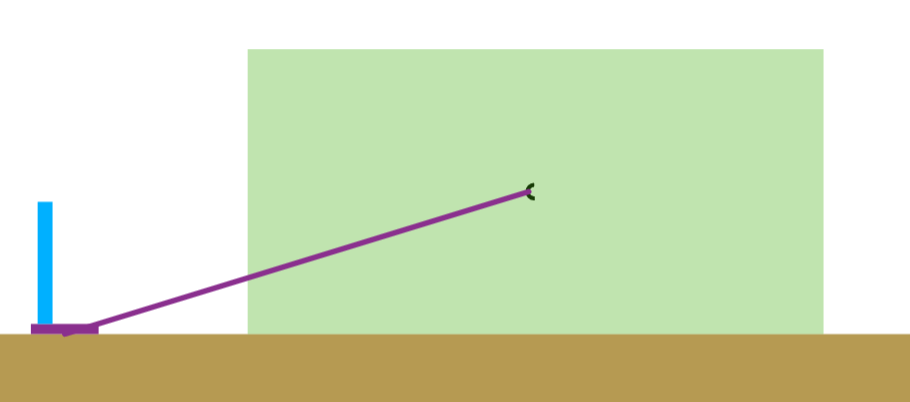
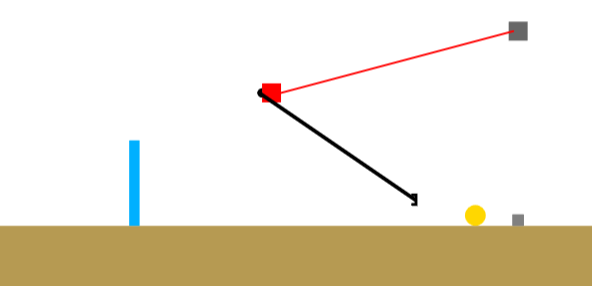
A “Not (links)” block can have just one item connecting to it, and it is on if the item connected to it is, and off if the item connected is on. This is necessary for How about making killing an enemy turn a stone launcher off.
The example shown doesn’t work, it turns it on!
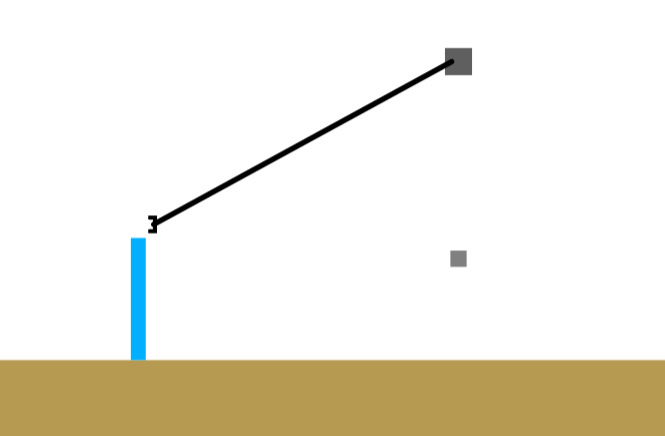
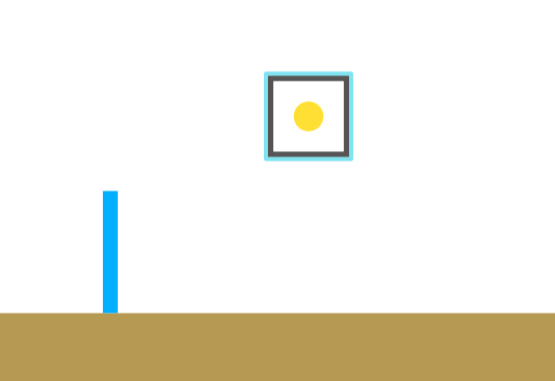
Instead add a “Not (links)”, and then connect the enemy to the “Not (links)”. Then connect “Not (links)” to the stone launcher.

In the image above the “Not (links)” is on, as the enemy “button” is off. When the enemy is killed it the “Not (links)” will turn on, turning the stone launcher on.
Combining logic blocks
Logic blocks can be connected to each other, with lots of them in use and just one item being controlled as the end result, this is often useful as just one block might not get the result you want.
Sometimes the connections will be useless, connecting a “Not” to a “Not” is the same as not using the “Not”. To make it easier to read the “(links)” has been removed from the name “Not (links)”.
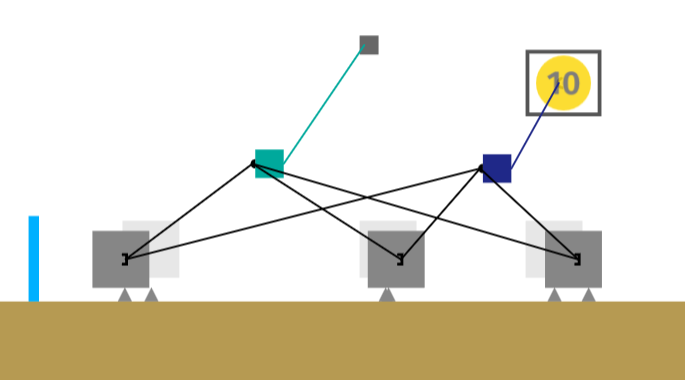
More useful combinations like “if all the enemies are dead then turn the stone launcher off” can be made: Connect the enemies to an “And” block, then connect the “And” to a “Not” which is connected to the stone launcher:
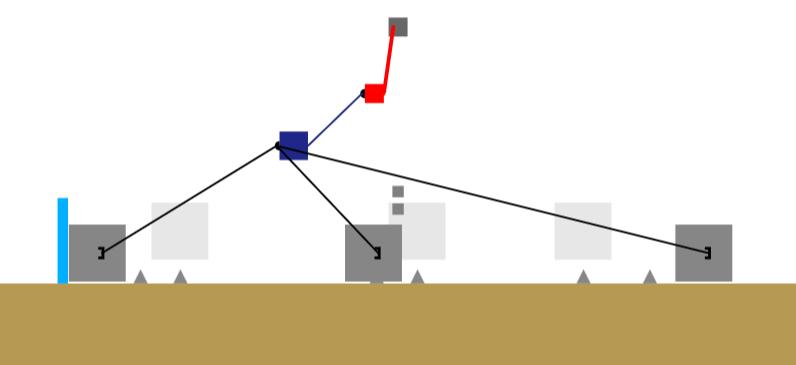
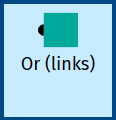
Any button is on?
A “Or” block can have lots of items connecting to it, and is on if any of the items connected to it are. It can be used to turn the stone launcher on when any of a group of enemies are killed. It is used like an “And” block.
You can imitate the behaviour of “Or” with a combination of “And” and “Not”, but that uses a lot of blocks. Using the “Or” block is easier.
In this case, add your enemies, then add an “Or”, connect all the enemies to it, and finally connect the “Or” to the stone launcher.
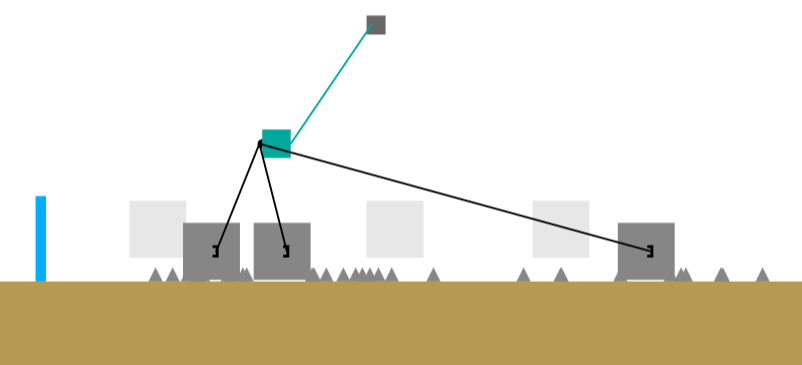
Adding a “Not” between the stone launcher and the “Or” makes it so that the stone launcher turns off when any enemy is killed.
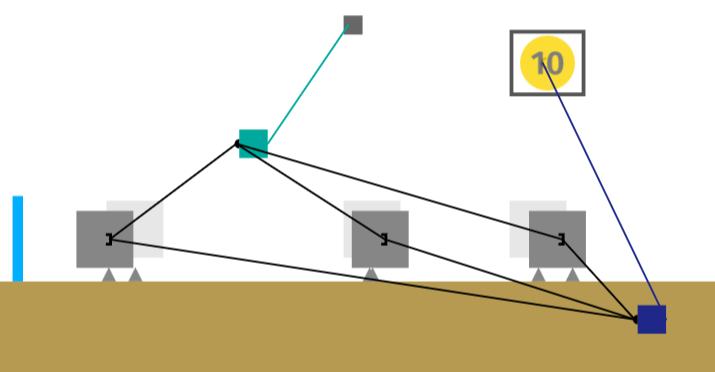
When use different logic blocks together it can be made for example that the stone launcher turns on when any enemy is killed and a “Ten Coin” is released when they are all killed:
You can move logic blocks around to make it easier to see where all the lines connect:
Appearing platforms
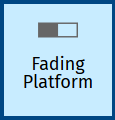
To have a platform that can be shown (turned on) and hidden (turned off) add a “Fading Platform”.
For example a coin could be put in a cave, and collecting it makes a platform appear to let the player jump out. You can use “Cutout” to make a cave, then, after adding the fading platform and coin, connect the coin to the fading platform.
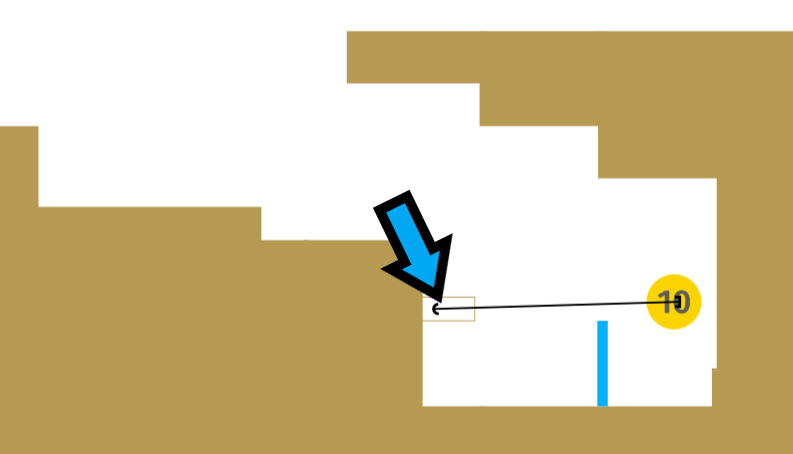
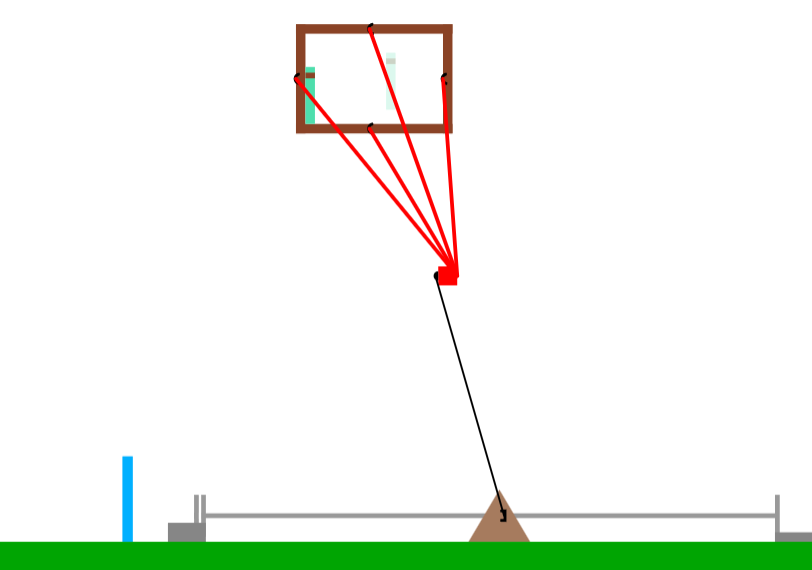
When using the level builder a hidden fading platform will have an outline (as pointed to by the arrow).
If you play this level and discover a particular hidden region it will make a set of platforms appear with coins in them. This uses a several fading platforms and pickup spawners and a collapsing platform:
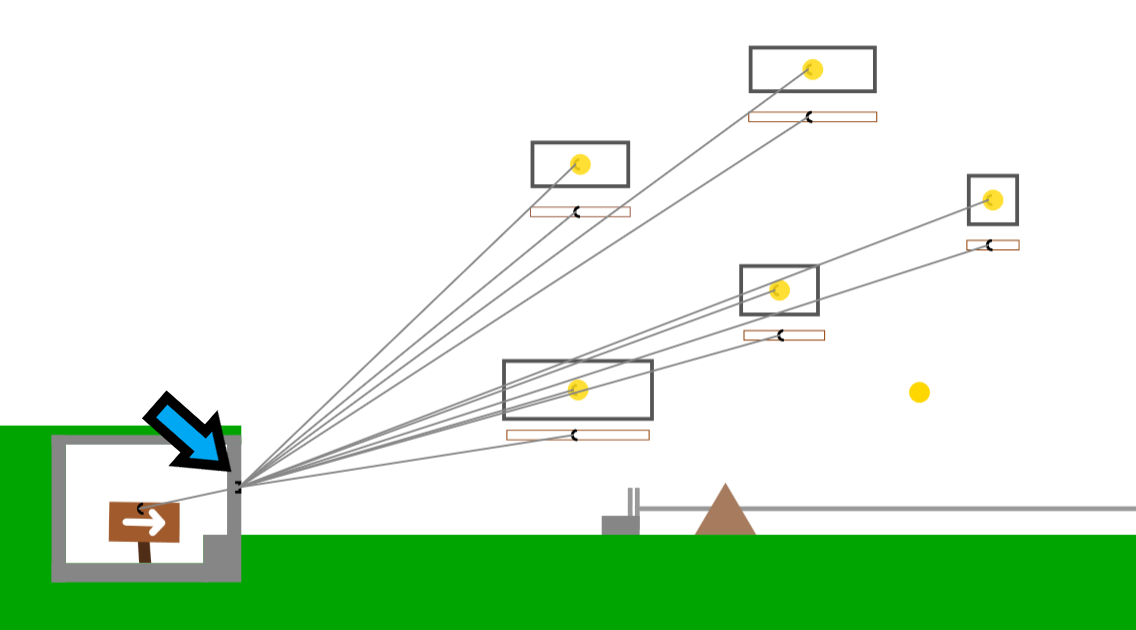
The arrow indicates the collapsing platform that causes all the fading platforms and pickups to appear.
An enemy could be prevented from attacking the player (and the player shooting it) by a set of fading platforms. This is done by surrounding the enemy with fading platforms, then add a “Not”. Connect the button that causes the enemy to attack to the “Not”, and the “Not” to each fading platform. The “Not” is needed to have the platforms on while the button is off.
Hit regions
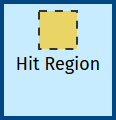
A kind of button that is on when the player is at a particular point is a “Hit Region”:
Once the player isn’t at the point the hit region is set to it will turn off again.
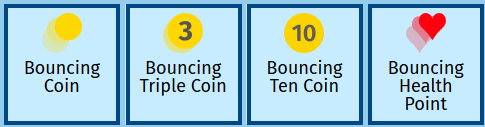
In the list of items to insert there are some “Bouncing” pickups near the bottom which fall to the ground and bounce a bit.
They will stop bouncing quite quickly, so you’d only want it to start falling when the player reaches it, otherwise it will be still by the time the player gets there.
You add a “Hit Region” just like a platform by dragging a rectangle to mark the area the player has to reach The yellow rectangle and dashed outline are only shown in the level builder:
Connecting the hit region to a pickup spawner (with a bouncing coin put inside). Now the coin will appear when the player gets to the hit region.

There are lots of uses for hit regions, for example it could be connected to a moving platform, with the are the region covers only being where a player’s feet would be, so that it moves when the player is on the platform:
Staying on even when turned off
A “Received True?” logic block is on if a button that is connected to it has every been on, so once it comes on, it never turns back off again.
If you put some types of enemy far away from the player it will still move towards it. To ensure this only happens when the player gets close enough using a hit region combined with a received true to prevent the enemies being turned off afterwards works.
You use a “Received True?” a bit like “Not” as it modifies the effect of a button.
On after 5s
A “Timeout” logic block turns on a few seconds after a button connected to it has turned, and stayed, on.

The timeouts can be chained, so putting a 0.25s and a 1s together gives the same effect as having a 1.25s timeout.
For example a moving platform that starts 1.25s after the switch is turned on:
In an arena it could be used to release an enemy into the game after 20s, say. To get a button that is on as soon as the level starts use a special block “Always True” as the (invisible) button.

A gate
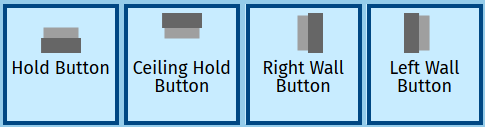
There are a few types of “Hold” buttons, each on when pushed in a specific direction (down, up, right and left):
Combining them with a moving platform and logics blocks can create a gate (with some fading platforms to ensure the player can run over an open gate smoothly):
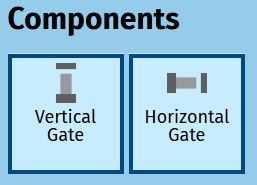
You don’t need to know how to create that though! The level builder lets you add a pre-made gate to your levels. In the insert menu, at the bottom there is a “Components” section that contains gates you can add in one click:
There are about 20 items inside each of the “Gate” components. A simpler gate that doesn’t work in as many situations can be made though.
You can colour the parts of the gate with “Colour” in the builder controls after it has been added (the default colours are black and grey):
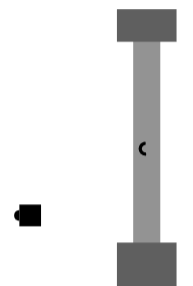
If you add one to the level you will notice a black logic block near it:

This block is used to control the gate. Connect the button controlling the gate to the block. Switching the gate on will open it, and turning (or keeping it off) will make it close.
Conclusion
That covers most of the items you can control (or link to). That isn’t all of them though. More can be found here.
More features of the level builder will be covered next time.
Have fun making levels!